


Poppie’s Final Week of Principal Photography
- Apr 4, 2019
- 9 min read
The first week of April also marked the last week of filming on Poppie’s Café for Monsters. At this point, we had covered enough ground and only two small scenes left to film at the Juniper’s Lounge, that we could afford spending half a day on pick-ups.
Monday, 1 April 2019
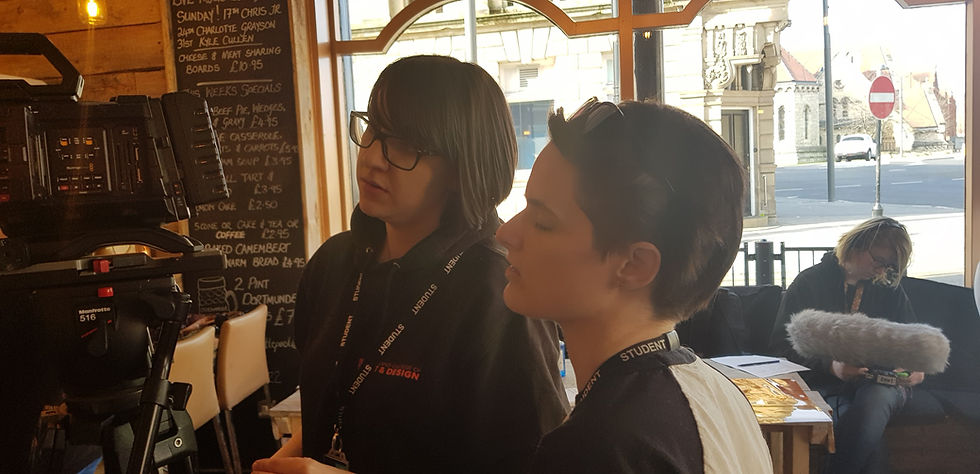
Monday again started with a round of equipment collection at 9.00, which also brought back the previous conflict of having to wait for equipment handover. Whilst our schedule accounted for that issue better this time, we were nonetheless hampered by the fact that our location manager was not able to open the location before 10.00.
Because of the fact that we had to wait on a CFast-card being ready to go out (the data from the previous shoot still had to be transferred onto the EditShare), I delegated some of my tasks to the crew via group chat while waiting for the card. Thus, we were able to start filming at roughly 11.30.

But despite the loss of 2,5h of filming, we managed to catch up on our shooting schedule and to actually film some of our storyboarded shots the way we intended them to look. With some other shots, we even managed to further improve them, now that we had the opportunity at hand. Thus, some cutaways did get an overhaul, one of them being the tea table setup in the final scene.
Always Double-Check Your Settings
However, due to the time rush I made the mistake of accidentally filming the project in 2k that day. Whilst I had even checked the camera settings prior to the first take, due to the time pressure I did not pick up on the fact that we did not film in 1080p and just carried on with my work.
I only picked it up late that day when we were almost done with Scene 7 and 10, the two scenes we needed to film on that location. Because of that issue, I was worried about the compatibility of our footage from that day. Whilst downscaling footage in general is less of a problem than blowing it up, I was still unsure whether there would be a way of downscaling or transforming it to the point that it would match up with our previous footage of that project.
Thus, with the help of Adam who found the converting software WinxDVD online, we did a test conversion of one of our clips and converted it to the required H.264 codec and audio bit rate of 48.000Hz that Avid Media Composer would require to take the clip.

Once the clip was converted, both Adam and I did two test runs of it on one of our editing computers; firstly, on its own, and secondly, compared to the original 2k footage.
How relieved I was when I realised that it looked good!
Sure, next to the 2k-footage there is definitely some loss of quality occurring, but the clip on its own did look like a proper 1080p video clip. Whilst we will have to see whether a difference in quality will be visible in the final edit, the main question to settle for now was whether the clips would run at all – and especially if put through Avid.
So we did a quick test run of that as well and when Avid gladly took the clip, I was relieved.
Tuesday, 2 April 2019
After the camera setting issue of the previous day and the successful conversion of all the clips we shot on that day, we collectively decided that we would film the rest of the project in 1080p as usual.
Pick-ups
Because this day was dedicated to getting more pickups, Chloe had scheduled our actors for the shape-shifting scene to come in again. But since they would only be able to come in later that day, we tried to pick up the outside scenes again. Since it was an overcast day, I hoped that we would thus get rid of the overexposure issues. However, this only worked partly.
Although we did pick up the wide shot of Benjie entering the café for the first time, the close up of him was still not possible to recreate. At the point in which ‘only’ half the background was overexposed, the front was already massively underexposed, with no access of additional lights and scrim that time. While the issue itself was slightly better than on the previous shoot, it was still not enough to balance the light levels with the equipment at hand and my current experience.
A Re-Do of the Shape-Shift
Later that day, we then finally picked up the shape-shifting scene again, which looked much better this time. Because the changing background in that shot gave away too much, our last take of this shot looked like the shape-shifter had physically teleported. Thus, this time I decided to cheat the shot and tweak the framing slightly so as to only get the brick wall into the background.
Since we also had the the slider fixed previous to our set up, the shot worked out much smoother, and thus, better this time. However, since this was our last day on that location, we took the safe route and did an alternative shot that was static, but more reliant on using the morph effect in editing.
With the pick-ups, we then finalised the scenes in the café. Because we ended up having two characters played by one actress – namely Chloe – passing them off as twins, we needed to establish that fact by showing them both in a shot. In order to make this illusion work, Lynley and I decided to use split screen work.

Thus, we filmed the first half of the scene and kept the camera in the same position until Chloe had changed makeup and costume, before we ventured into filming the second half. This turned out to be a battle against time as we progressively lost more and more daylight. In order to battle this fact and give our editors an easier time, I progressively adjusted the shutter angle and adapted the white balance, constantly checking back with the first clip taken, to ensure it was not only balanced but also as similar as possible.
When the last two shots were done for that project, we finally wrapped up that lovely location and looked forwards to the final day of filming.
Wednesday, 3 April 2019
On Wednesday, we moved onto the two final scenes of our project, both of which take place in Agnes’ bedroom. Since we struggled finding a bedroom location to film in until the last moment, I sadly did not find the time amidst the rest of the preparation for the shoot to include a location recce of the place, which I realised, was a mistake. So, when I arrived on location, it ended up being much smaller than I thought.
For the first, the room itself was too small to put a track and dolly in there, which is why I then considered using the slider in order to at least have slight movement in the shot. Sadly, the room itself and with the furniture in was so small that we were not even able to put up a single tripod in there. Which is why we had to scrap all our tracking shots from the storyboard and go handheld for the entirety of both scenes.
Furthermore, due to the smallness of the room, we shot with a reduced crew, cutting Katie and Adam out for this shooting day. This proved to be the right decision as the remaining skeleton crew – Lynley, Hannah, Chloe, Nathan, and I – were already crowding the place as it was.
The size of the room furthermore had implications on the shot sizes and lenses that I would be able to use. I had to retreat to solely using the widest lens at our disposal – a 24mm Samyang CineLens – because it was the only lens that would allow us to at least get mid shots in this room – with me being always backed up all the way against the opposite wall of the room of where the action was happening. Anything wider than a mid shot was not doable at this point, which is why we slightly deviated from the storyboard again and shot everything tighter than initially planned
Furthermore, the action shot that we had tested twice and planned so long for turned out to be more difficult to manage than we thought. It took us several takes, as I not only had to pull focus at the right time, but also had to balance on an apple box replacement in order to frame the shot right. For in order to match the height difference and make the smaller actress Chloe appear behind the taller actor Nathan’s back, I needed to be elevated.
Lighting
The lighting setup of this room took just about an hour. The green lighting I chose for this room was supposed to underline the strange and eerie feeling surrounding Agnes’ person and foreshadow what was eventually to come. Lighting such a small room however took some work, as I needed to reduce my initially planned lighting settings drastically within this small room to avoid hotspots and had to balance it without casting shadows of either cast or crew.
This time, the overexposure in the background window proved to be less of a problem, as there was an ivy-overgrown wall close to the window that could be seen from where I stood and thus provided what I considered to be a beautiful backdrop to the melancholy of the supposedly ’sickly’ Agnes.
Further Issues
Due to continuity issues regarding the tray and its contents being brought in by Nathan, I was not supposed to get the tray in shot. Whilst this seemed like a daunting task in the beginning however turned out to be less of a problem as the size of the room and my choice of lens and framing did result in not showing the tray at all.
Battery life turned out to be another crippling issue that tremendously cut down on our time and amount of takes, as two of the lighting V-locks died within only one hour of usage despite having been on charge for the night.
Wrapping Up
After the last shots and some more cutaways, we finally wrapped our project on location. My crew then returned the equipment to the stores, whilst I transferred the footage of the past two days onto the Editshare.
An Unexpected Lesson
After that, I was asked by one of our LVL6 directors to help film behind the scenes footage for their production that was happening in the ground floor film studio at the same time. I agreed and I was rewarded with a – late – lesson:
As this LVL6 project was filming on an indoor 1950’s office set that included mock windows, they had to recreate the outside world with the help of lighting and a lot of scrim. Thus, they attached the scrim on the windows where the glass would be and shone some light through it, recreating a soft background that reminded of windows, but without showing the background.
And while their goal was somewhat different to mine (mocking up a window where there was none vs. me trying to block out the outside world in all those shots), it nonetheless clicked with me:
I could have blocked the windows of Juniper Lounge and – due to the lack of lighting equipment – let the sunlight do the rest. Whilst the interim solution would result in a background of white canvas of sorts, this background would have been a better backdrop to then adding a fake background image in post. At least a better one that I created with my overexposed background that does bleed into the window frames.
However, after this realisation of sorts, I also realised that Juniper’s window front of 9m x 3,5m x 2 (length x height x number of fronts), would have resulted in a staggering amount of 63m² (or 678,13 square foot) of scrim. Conducting some research on the price of scrim, I found that 100 square foot of LEE 250 1/2 White Diffusion scrim cost roughly £64 incl. VAT. So all in all, we would have required an additional £434 budget just to afford enough scrim.

My Learning
Thus, for reasons of brevity, this is my short summary of my learning from this final week of principal photography:
ALWAYS check the camera settings
If in doubt, double-check the camera settings
No matter how stressful, check the camera settings
If in doubt, use scrim to cover/mock up windows and avoid background overexposure
Read up on and experiment with blocking light and reducing/adapting to overexposure
And last but not least:
Sometimes, the solutions to a problem come to you after the fact. Accept that and use your learning next time. For there will always be a next time.
References:
CVP (2019) LEE FILTERS LEE 250 1/2 FILTER ROLL [online] Image taken from: https://cvp.com/product/lee_250 [Accessed on 4 April 2019]
Comments