


The Long Last Week of Editing: Of Stat’s Tables, Sentient Numbers, and Sound Editing
- May 7, 2019
- 20 min read
Live Project 2 has already – and rather unbelievably – neared its end and we have officially come to my final blog entry for this module.
It is with mixed feelings that I will write about my editing progress and learning of the past week. The editing process of the past six working days described here not only entailed a lot of back-and-forth between After Effects and AVID for adjustments, it first and foremost entailed the design of a character stat’s table, the employment of self-revealing texts and numbers, and a lot of sound editing.
Which is why I won’t lose any more time and get to the meat of it now. Enjoy the last intensive blog entry before the hiatus and stay tuned for further blog entries in the near future!
Monday, 29 April 2019
Straight away, Monday was set out to be a busy day as I have planned a lot of effects over the weekend, and still had to finish some from last week (especially the backgrounds and the Dragon Ball Effect). As we did not have the correct backgrounds available last Friday in regard to resolution and framerate, the first order of the day was to obtain them from our producer, which I also did.
However, upon obtaining them, I quickly realised that all but one of them still had the wrong resolution and the wrong framerate. From what it seemed, the sources that provided the backgrounds were either not dependable enough in their correct description of the file specs or they only had US-American framerates of 30fps and 60fps to offer.
Since this was now creating a time-issue for the edit – the backgrounds were one of the two required next steps in my editing process, I had to send out our camera op Adam and our director Craig to film some backgrounds for us in the area, whilst I went on editing the second important effect of the day.
Finding Inspiration
Thus, I started creating the character’s stats sheet. For this, I already looked at some resources over the weekend to get a feel for the general design as well as common traits that all of them shared. Going more into detail, I researched character sheets from five random RPG computer games to get a feel for the overall style that supported the fantastic layout that our director had envisioned. I’ve listed these examples below:


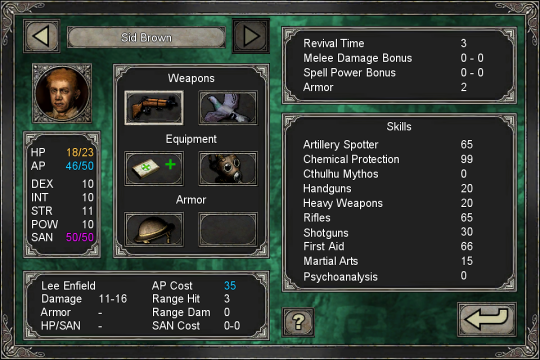


With these, the similarities of some properties are rather apparent, such as e.g. the display of the character’s name, the embossed white and/or golden lettering, the fantastic fonts, the nesting of boxes that creates frames, and textured backgrounds that resembled aged leather, marble, or granite. Here, one of the above-mentioned examples is extremely apparent as it lacks any texture, giving it a somewhat cheap look.
With this frame of reference, I quickly designed a rough draft of my own design in order to understand the setup a bit better and asked our director for his colour preferences. Whilst he suggested golden letters on a white background, I found this colour palette rather difficult to read on a screen and proposed my design, based on the research above. With the premise that I keep to golden lettering where feasible, I was allowed to proceed with my design.

My Research
Thus, I then moved on to researching the resources to make the stat’s table come alive in the edit. For this, and because we were recurringly talking about it in the production meetings, I looked at effects tutorials that featured the creation of self-filling bars…
…and self-increasing numbers.
This I did in order to have two methods to choose from in case one fails in application due to a missing plug-in (or me struggling to implement it).
Since I was essentially basing my design on a table, I also looked into tutorials on how to create animated tables for factual content, the most helpful of which was the following:
In tandem with a more authentic “natural” design of the stats table, I furthermore had a look into creating marble-like designs using the lighting effect that After Effects offered…
… and looked into the application of the Emboss and Embed effect for the lettering of the stats table, which is another effect offered by this After Effects tutorial.
Stats Tables Galore!
Armed with the knowledge of my resources, I set about to implement my design. However, as with all plans, the execution did not exactly work out the way I thought.
For a first, the workflow that was proposed by SonduckFilm’s video indicated using solid layers as groundwork for the table. However, our current version of After Effects did not allow to apply more than two to be applied above each other, leaving me wanting for four more layers. In order to create these boxes, I thus moved on to shapes:


However, it then turned out that effects – such as my researched marble effect – do not apply within shapes but only within layers. Whilst shapes can be filled with colour, creating textures was thus not in it for me. With this, I realised that recreating the layers did not work out as I thought it would.
Thus, I decided to forget applying textures and went on creating more shapes. Here, I realised that I was able to apply spotlights onto the two solid layers that created the foundation of the stats table by using the Light Ray and especially the Light Sweep effect. Since they are designed to imitate real light rays, I was even able to layer them on top of shapes. As such, I decided to apply them to the composition and voilà! I had created a surface that seemed to reflect light.


With this bit of texture, I then figured that I could obtain my desired textures by reducing the opacity of the entire stats composition later on in the process and thus have the background seep through slightly.
With this solution, I finally went on to the font design. Since a fantastic font with white and golden embellishments was planned, I followed the suggestions of the video above, by adding text layers onto the composition, adding the Emboss and Embed effect onto them and blend it with the original font by roughly 40%. Thus, my text quickly looked like this:


Adjusting and tweaking little bits of my design, my final outcome of the stats table looked like this:


Creating a Loading Screen
Having finished this, I moved onto the design of the screensaver/loading page that we intended to use at the beginning and end of our video to give it more of a computer game appearance. Whilst the background itself has been designed by Craig, I wanted to use a text animation on top of it. Since we are emulating the character design stage of RPG games, I found that an animated loading screen at the beginning and end would be a nice feat to have, so I animated the text ”loading…” using the help provided by this tutorial here:
Whilst I also looked up tutorials on how to do that in After Effects over the weekend, once I attempted them in the edit suite, they did not work with our version as the plugins for the required effects were missing.
However, following the tutorial above, I was thus – for the first time in my editing life – able to use key frames. Thus, in order to achieve the self-revealing text, I added the Layer Swipe effect onto the text layer, and added keyframes in the relevant moments. Now in order to make the text appear and disappear from one keyframe to the next, I would have to set the value for transparency at 100% at the first keyframe and at 0% at the last keyframe to make it appear, and just exactly the other way round to make it disappear. Now, with a Swipe effect direction of -90° horizontally, the effect was as follows:


Green Screen Adventure
After this adventure, I was then given the remaining backgrounds, so I reverted to colour-correcting the remaining backgrounds in DaVinci, imported them into AE and then chroma-keyed and colour graded them, which took a moment.
Especially the process of blowing up the background videos and taking cutouts of them for our CUs and MCUs took a bit of experimentation, since some of them had a different angle and perspective to them.


After that, I went on colour grading the masked layers with our actor to make these work with their respective backgrounds as seamlessly as possible.


Having done that I then went through all my compositions, trying to incorporate the character sheet – which in itself was a delicate multilayered composition – to see whether the angle, position and size matched with the rest of the footage.

The Dragon Ball Effect
Finally, I went on to completing the Dragon Ball Effect scene, of which only a third was done. As described in my previous blog entry, I kept on using the smoke puffs that I created myself and filled the rest of the footage with them. This was a bit of work to do since this particular effect takes a lot of capacity from the computer, requiring After Effects to render and autosave quite a lot.
After this was finished, I created another composition of this effect by highlighting all the layers, right-clicking and selecting the option Create Precomposition. I then sped up the clip by the factor 5 using a Timewarp effect onto the entire composition, added a Lens Blur Effect and Radial Fast Blur and finally masked the face out in order to make this effect work by contrast – the rather still face with the speed-up punches.

For the final effects added, I set another round of keyframes at the beginning to make the character start at a normal speed and have him pick up speed as the starts punching. Here, I realised that I had to go back and forth redoing stuff as some of the effects did not sit perfectly well and as I had forgotten to incorporate the stats table on top of it all.

However, this – in turn – meant that I would have to move our actor more to screen right to make everything fit in the edit. But that also meant that I would have to relocate every single one of my roughly 60 smoke puffs – which would have been the work of another two hours; two hours that we could not afford in our schedule.
That was… until I realised that I could simply create another composition that only includes the layer with our actor (and the 60 smoke puffs), but excluded the background, allowing me to enter the table between them later on and move our actor's layer about freely. Said and done!

Finally, since it was only 30 minutes left until uni closed, I decided to have all my finished clips export overnight. Since there were a lot of very heavy effects involved that might take a lot of time, I decided that this would be the most feasible option in order to save as much time as possible. Thus, I exported all clips that were prepared so far and added them to a render queue, exporting all clips in full length as AVI, with 1080p resolution, a framerate of 25fps, and 48.000kHz on a 16bit rate; letting the computer run overnight.
Whilst this was already a good start into my final week of editing, I will definitely have to go back to AE to finalise some of the effects. This is due to the fact that some effects, especially the stat’s table, will show animated numbers that are reacting to our actor in real time. And whilst animating the numbers will be the easier part, following the tutorial above and using the Slider effect, finding the right timing together with the sound edit will be of the essence, which is why I now need to edit first, before being able to get the timing right.
Tuesday, 30 April 2019
Tuesday was filled with many attempts of exporting, consolidating and tweaking clips for the edit in AVID. Coming back early that day, After Effects had really exported all the clips. However, the final format (and thus the AVI codec selected yesterday) were not right, as the clips – especially the effects-heavy Dragon Ball effect, struggled to run in real time. Thus, I did a test export in another codec – which then was the DNxHD codec for Quicktime – and, lo and behold!, the exported clip ran smoothly on both VLC as well as AVID.
Performance Struggles
As such, I had to re-export all the clips that I created in After Effects, which took a lot of time as my editing computer did not only struggle to stay on the Editshare (I needed to log off and back on a couple of times and even had to restart the computer thrice), it also turned out, that – for some unexplainable reason – the Avid Media Composer had been deleted from my editing machine and needed reinstalling by our technician demonstrator.
So after 2,5 hours, I was finally able to import and consolidate all the previously exported clips into AVID – or so I thought – for Avid kept cancelling or interrupting the consolidation every couple of clips to the point that me either
Restarting the process
Turning Avid off
Logging off the Editshare and logging back on, as well as
Restarting the computer
...took another 1,5 hours.
When I finally had most of the relevant clips imported and consolidated after four hours, I was finally able to start sub-clipping my video and audio files using the AutoSync tool that Avid so kindly provides. Since we recorded audio on two different tracks, this process however took a bit to getting done, especially when the audio mismatched by a frame, producing a terrible echo with the sound of the slate.
Having done the basic preparations, I was finally able to start the timeline assembly in the required and storyboarded sequence. Albeit some colour corrections that I will have to tweak and polish later on, this process went quite well for most of the clips that take place in the infinity cove.
As for some clips in the later bit, I found some minor timing issues and effects that did not quite work out as intended and which I will have to go back to and overhaul as well.
Give Your Editor A Break!
The biggest issue I had to face with this rough cut, however, was a lack of continuity and a very reduced amount of time between the call for action, the action itself, and the call for cut. The lack of breaks went so far as almost interrupting the dialogue and/or cutting the actor off mid-action. This gave me very little wiggle room to play around and forced me to force continuity quite a bit, which was further enhanced by the fact that we had a very little amount of workable shots to begin with, since some of the action ended up getting out of frame or out of focus.
Furthermore, due to the lack of a variety of storyboarded shots, I’ve encountered some jump-cuts that I will have to eliminate by playing around a bit more with the timeline. Some of these jump-cuts, I will be able erase by tweaking the order of the footage just slightly. But since I did not manage to get through everything then, I had to come back to that on Wednesday.
With the clips cut and brought to the timeline, I am however now able to make much more defined arrangements and tweak our footage timing-wise. And whilst this entails dedicating a lot of time going back and forth, the workflow so far was effective enough that only one clip acted up. This was the Dragon Ball Effect scene, which does not execute AutoSync properly, probably due to its framerate of 50fps, and which might require another export at 25fps.
My Learning in Three Parts
Time is very elastic and so is especially editing time. If you think that you should be able to implement something ’real quick’, simply forget that and estimate about the tenfold amount of time for it. This is the realistic amount of time you will be going for.
Next time I am on a shoot, I will ensure that there is enough time between the action and the call for action/cut in order to make the shots flow better in the edit.
Regarding my chosen workflow, I am not yet sure whether this is really the best workflow for this project. Although After Effects’ Green Screen work is far beyond what Avid’s Chroma Key effect can do, this increase in quality and applicability also directly results in an increase in application time and processes.
Wednesday, 1 May 2019
Wednesday was first spent with a production meeting with our director in the morning, in which we discussed possible solutions to the jump cuts that I’ve encountered in the first rough cut put together the day before.
As such, we had issues between the shots #6 and #7, as well as #7 and #8, where we also encountered issues with the clothes change effect from the infinity cove to the apocalypse. While the change on the actual person was fine, the tremendous background change itself made the cut jumpy.
Thus, we debated whether we would have to film some pick-ups in order to cover the jump-cuts. However, once our director/producer contacted our actors, we quickly found out that they were already occupied due to prior commitments and that we would indeed not be able to pick these shots up in time before hand-in.
Because of that, we collectively thought about solutions to cover these issues, when our director came up with the solution of using the loading screen as a sort of cutaway.
Experimenting with this suggestion, I inserted the loading screen into the cut. Whilst it did indeed help – and immediately made us all perceive it like a real computer game – it still needed adjustment to the timing. As this loading screen helped sell the feel of a computer game, I wanted to see whether we could also implement it at other jump cuts, thereby also allowing us to enhance the computer game aspect through repetitive use of the loading screen.
Following that production meeting, and since we were still missing an intro to our film, I presented our director a design of an intro that I also based on the loading screen design and which he liked to use for our project:

Fixing the Little Things
I then proceeded onto tweaking the colour correction of shots #3, #4, and #7, which was slightly off, and reinserted – as well as AutoSynced – them in AVID to match them up with the rest of the footage.
After that, I went back to the source compositions of shots #13, #14, #16, and #18 in After Effects and adjusted the background slightly to make them flow with the rest of the footage and eradicate the minor visual noise that occured in some movements
Finally, I moved on to check the source compositions for the right timing of the chart insertions and – most importantly – the automated numerical changes in the chart itself. For this, I ran both Avid and After Effects and compared (as well as matched up) the exact frame at which I wanted to insert the chart. I then moved onto After Effects, inserted the chart compilation that I previously created as a seperate layer into the compositions, layering it between the background layers and the actor’s layers to give a bit of depth to the image.
Thursday, 2 May 2019
As mapped out on Wednesday, Thursday was dedicated to getting the last files on the timeline and getting the rough cut done, before finally starting the sound edit. Thus, first thing in the morning, I reviewed the clips that I let export overnight and marked the ones that went well and the ones that didn’t.
Some of these latter clips showed visual noise (such as an intermediate layer – here the chart – showing through) or even had the wrong type of chart inserted. I re-exported the faulty clips, while already starting to ingest, consolidate, sync, and bring onto the timeline the clips that went well and after the second export was done, I again checked the quality of these clips before finally being able to bring them into Avid.

With almost all the clips ingested and brought onto the timeline, I was able to improve upon the very rough cut that I made by improving upon the timing. Since we were left with no option of reshooting before hand-in, I chose to deploy the loading screen as a filler whenever needed, which worked out quite well to my mind.
After all that was done, I looked at the title sequence that I created the day before, and since I was not happy with the timing of the titles coming along, I decided that I would export a couple of different versions to have a variety to chose from and to offer for our director. Thus, I ended up with four different versions, the last of which I personally liked best timing-wise.
With the picture lock-down (our director was also happy with the creative choices that I made), I then moved onto the sound edit. I thus listened to the provided sound clips as well as foley sounds, and ingested the most suitable ones for our project.


Putting them into the sequence however, I encountered that all sound files – both the ones Katie recorded, as well as the ones free for use – were mono sound files, which meant that I was only able to ingest them, if I used mono sound tracks and doubled the amount of tracks for every single sound file. Whilst it seemed a bit cumbersome, I thereby also learned that this made our general audio a lot more audible.
Inserting the copyright-free soundtracks and foley sounds, apart from the very first one, I was usually forced to bring the audio gain down quite a bit (around -26db to -29db), whereas I was forced to bring our narrator up by approx. +8db and our actor by +12 to make them more audible.
I furthermore started inserting popping sounds for when our actor falls from the sky into the character creation scene, as well as for most of the clothes change effects to make them more believable and entertaining.
Regarding the early calls for action and cuts as mentioned above, then required me to key him out completely and bring the audio down around these calls. This sadly resulted in one clip being almost completely silent, as the call happened to occur mid-take and the sound itself was very low to begin with. This was further enhanced by the fact that the story required us to cut all previous soundtracks for dramatic effect.
However, with the finetuning of the clips and the edit, as well as the sound editing, I managed to get halfway through my first sound edit, leaving me with roughly 2,5 min to fill with music and adapt on Friday.
Friday, 3 May 2019
On Friday, I finalised the sound edit, by adding some foley, such like a dragon’s roar, and the sound of a firing Uzi for our Dragon Ball Effect, much to our director’s liking. Much to my surprise, I was furthermore able to bring down the static hiss in some of the clips by cancelling out the second audio tracks of said clips.
Due to the fact that these clips were only ever recorded on a single track while the other one was muted or disarmed, they turned out to be too silent in the edit, Thus, I doubled the single audio clips after auto-syncing, and added them to the relevant clip in an attempt to get more volume out of them.
Interestingly enough, this hypercorrection of mine also reduced the overall sound quality due to hiss built-up that would only occur when doubling the exact same noise pattern at the exact same time (such as you would with two identical audio clips). Even more intringuingly, this did not happen with those clips that were recorded on both audio tracks.
My Solution
However, in regard to solving my hypercorrection, I thus muted one of these doubled clips by reducing their gain to infinity, which subsequently reduced the hiss in two of three affected videos.

The last video however, remained stubborn as neither this, nor reducing the gain on both clips, nor amplyfying the gain on one clip while muting the other did seem to do the trick. Furthermore, since there was also an echo involved, I also did not manage to get rid of that as of yet, which I will have to try on Tuesday.
Lastly, I tweaked some minor visual issues: Since some of the repetitive loading screens ended up being too repetitive in number, I deleted them wherever possible. Test-exporting the entire video for the first time, I found some issues that I still need to get rid of, such as e.g. a surplus of black video at the end.

Tuesday, 7 May 2019
After a long week, today came round as the final day of editing. The day started with designing the credits. Here, my goal was to have each section of the credits – cast, crew, and music contributions – appear and reappear like a tidal wave, giving a bit more animation and thus life to the credits. This took some time to accomplish, as I had to experiment with several layers – eight in total – and had to time each layer correctly using keyframes.


I exported the credits, imported them into Avid and consolidated them four times in total until the text, timing, and animation was right. I inserted the credits onto the timeline and went on polishing the sound edit some more as I went along.
Here, I again encountered the clip which had a strong hiss to it and found two more sound clips that had a strong echo to them. Applying my knowledge from the previous week, I experimented with the volume and the gain of each of them. However, it quickly turned out that this echo was imprinted into the clip, as it was the echo of the actual room, indicating that the mic was too far away from the actor’s mouth.
Due to time issues, I was sadly forced to move on after a string of attempts, still needing to balance all sound clips on a similar niveau. This turned out to be much trickier with our main actor than with our narrator, as our actor’s voice was really faint on some of the recordings.
Firstly, I thus started to amplify the gain on the clip and used the available maximum, which was +12db to improve upon the situation. However, this did not help as much as I hoped it would. Thus, I started doubling his audio track, in the hope that this might increase his volume. However, solidifying my learning from last week, doubling up the audio clip really did not improve his volume, but only added hiss to the sound.
Since time was now really pressing and I still had to export the clip and check its quality (as well as plan in additional time for re-exports, in case something was not adding up), I thus realised I had to make do with what I got and move on.
After adding some more foley sound effects to his charisma clip – the one where he uses his finger guns and kisses the air – did not have any foley prepared for it, so I added the popping sound onto them.

I then exported the clip with the settings for Quicktime videos, 1080p, 25fps, 48.000Kh and 16 bit sound. This export however did not work, as it lagged tremendously, reloaded and jumped when played back with VLC. Thus, I looked at the file size and realised that it was 6GB strong for only five minutes of footage, which indicated tom e that something was indeed wrong.
After checking the settings for a while and a lot of amended re-exports that all failed, I thus had another check with our technician demonstrator to see whether I really, truly sat on my eyes.
And I did.
For next to the settings for ’Same as Source’ in the export panel, there was a button for a possible customisable setting called ’Custom’ (duh!). Clicking on this, an entire folder opened up, allowing precise settings for both video, audio, and even for filters. and that’s where the key was soon found.
As it turned out, the entire clip was repeatedly exported with an animation codec instead of the usual H.264, which is normally used for exporting films on platforms such as Vimeo, Youtube, and the like. This now also explained the extremely big file size, since the animation codec does not compress the resulting files like the H.264 codec does (which is the reason why this is the go-to codec for any video service online: smaller file size, less server space required, quicker uploads and even quicker downloads).
After changing the setting and test-exporting the clip, it ran smoothly. This was also when I found some additional minor issues with the edit, that did not display themselves in AVID. Thus, I went back and forth a couple of times to eliminate them.
Lastly, I exported the video again and tested the clip on the projector next door, which ran marvellously there. After finalising the clip and saving my projects in both AVID and After Effects, I thus finally handed in our video clip into the official hand-in folder, thereby finishing my last module of LVL5 and awaiting the final results.

References:
Caleb Lancaster (2016) Text Behind Moving Objects - After Effects Tutorial
[online] https://www.youtube.com/watch?v=EGMk271ypd4&list=PLRG4t0YYtkIzejIqbZ-qKOLjQchEri9ev&index=97&t=0s [Accessed on 27 April 2019]
Cinecom.net (2017) SCRIBBLE Animation in PREMIERE PRO (That's what I like - Bruno Mars) | Cinecom.net [online] [Accessed on 27 April 2019]
Learnin5. (2015) Animating Numbers Counting Up In After Effects | Beginner Tutorial [online] https://www.youtube.com/watch?v=RQPwWZuyzZk [Accessed on 28 April 2019]
Loong Dragonblood. (2010) Chapter 7: Character Window [online] Image taken from: http://loong.gamigo.com/en/guide/character_information/ [Accessed on 28 April 2019]
Move Shapes. (2018) Animated Infographic Chart After Effects Tutorial [online] https://www.youtube.com/watch?v=EgxGPlNxgtg [Accessed on 28 April 2019]
Orange83 (2017) How to make TEXT POP-IN screen while talking? Premiere Pro tutorial [online] https://www.youtube.com/watch?v=7kQJifNIa1U&list=PLRG4t0YYtkIzejIqbZ-qKOLjQchEri9ev&index=63&t=0s [Accessed on 27 April 2019]
Pat Flynn. (2012) How to Add "Pop Up Text" to Your Videos [online] https://www.youtube.com/watch?v=ZV_jaKI5feM&list=PLRG4t0YYtkIzejIqbZ-qKOLjQchEri9ev&index=62&t=0s [Accessed on 27 April 2019]
Premiumbeat by Shutterstock. (2013) How to Create a Bar Graph in Adobe After Effects [online] https://www.youtube.com/watch?v=3iqriS-TrtA [Accessed on 28 April 2019]
Rawlings, T. (2012) Getting the Numbers Right in Game Design [online] Image taken from: https://agreatbecoming.com/2012/08/07/getting-the-numbers-right-in-game-design/ [28 April 2019]
Short-Form Video (2010) After Effects Tutorial - Super-easy marble effect [online] https://www.youtube.com/watch?v=wuYAL6eeFY4&list=PL109032223E88423C&index=4&t=0s [Accessed on 28 April 2019]
Sinister Design. (2011) What makes an RPG an RPG: a universal definition [online] Image taken from: https://sinisterdesign.net/what-makes-an-rpg-an-rpg-a-universal-definition/ [Accessed on 28 April 2019]
SonduckFilm. (2018) Create Animated Infographics With Motion Graphics | After Effects Tutorial [online] https://www.youtube.com/watch?v=n3UfBb23yR4 [Accessed on 28 April 2019]
tutvid. (2018) How to Make 5 SIMPLE Animations in AFTER EFFECTS CC [online] https://www.youtube.com/watch?v=Ztwm0OTPqyI [Accessed on 28 April 2019]
VincentASM. (2015) Vestaria Saga: Character Stats [online] Imagine taken from: https://serenesforest.net/2015/11/21/vestaria-saga-character-stats/ [Accessed on 28 April 2019]
Comments